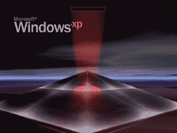
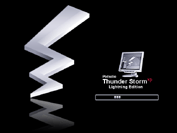
Windows XP Startup Screen
What is the very first thing you see when you power up your Windows XP Computer?
The same old boring Windows Startup Screen. *yawnz*
How nice would it be if I could see the nice scenery of Alaska or even Jessica Alba in bikini on my laptop screen while I was waiting for Windows XP to startup.
Theme XP is your solution to your very own personalised Window Startup Screen!
You'll find over a thousand of them, organised by categories such as Sports, TV/Movies, and so on.
Imagine Jessica Alba smiling at you early in the morning when you turn on your laptop in office. What a nice way to greet a new day, isn’t it?
So how should we go about changing it?
Once you've found the image you want to use, download it.
It will be downloaded as a .zip file.
Normally I create a folder (example: C:\bootscreen) to store all my Startup Screen Image so I wont have trouble looking for it next time if I want to change it again.
Unzip the contents of the .zip file into the folder.
There will be one or more files, including ReadMe files.
The boot screen itself, however, will be named ntoskrnl.exe.
The ntoskrnl.exe file is an executable file that contains the Windows XP Startup Screen.
During the boot process, Windows XP executes this file, found in C:\Windows\System32, which in turn displays the Startup Screen graphic.
So, to change your Startup Screen, replace your existing ntoskrnl.exe file with the one you just downloaded.
But wait!
Don’t think that all you have to do is to copy the ntoskml.exe file over the existing one and restart your computer to take effect.
There’s more to it, Windows XP actually protects the system files from begin over written. So Windows File Protection will automatically replace the file to original Windows XP files if it detects any changes made.
Here comes the trick part.
However, if you make the change in Safe Mode, Windows File Protection won't kick in and you can safely copy the file. *grin*
Reboot your PC and press F8 immediately to get into Safe Mode.
Now go to the C:\Windows\System32 folder and find the ntoskrnl.exe file.
Copy it to another folder or rename it as a backup so that you can revert to it when you no longer want to use your new Startup Screen, or if something goes wrong when you install the new screen.
Now copy the new ntoskrnl.exe file into C:\Windows\System32.
Reboot your computer again but don't go into Safe Mode this time.
Your new Windows Startup Screen or Splash Screen will now appear every time you start your Personal Computer!
Now I have Jessica Alba smiling at me every morning when I turn on my laptop. =P
To revert to your old Windows Startup Screen or Splash Screen, repeat the steps, copying your original ntoskrnl.exe file over your new one.


2 cent worth of Important note:
It's possible that something will go wrong with your new Boot Screen, so before making the change, create a System Restore Point by choosing Control Panel > Performance and Maintenance > System Restore and following the instructions. If something goes wrong, you can revert to that restore point.
Found this article useful?
Mention us in your post, subscribe to our feed, link to us, or bookmark this site.
Thanks for your support!


Post a Comment