
Windows Defender
Detect And Eliminate Malware Using Windows Defender
Windows Defender is a tool built in Windows Vista. Currently it's also available as a free download from Microsoft for Windows XP users.
This application lets you do manual, scheduled, and real-time scanning with automatic updates of spyware signatures, without a large performance penalty.
You can also use it to control what applications run at startup.
Of course, if you are already using a third-party anti-spyware application, there's really no reason to have Windows Defender's real-time scan enabled.
(You can get a performance increase by disabling it)
Firstly, to get to Windows Defender open your 'Control Panel' > 'Security' > 'Windows Defender'.
After playing around, you might notice Windows Defender is more than a scanning tool.
Select 'Tools' > 'Software Explorer'.
Now you can see the Windows Defender screen that lets you manage the startup programs.
You can choose to Remove or just Disable any startup item using this panel, as well as lots of other useful information so that you can see what each item is.
(Disabling startup program that you rarely use could improve booting up time)
One of the feature which I find annoying is the Real-Time scanning.
It's one of the reason which caused hard drive to be always busy. To disable it, simply go to 'Tools' > 'Options' and disable it.
Uncheck the box for 'Use real-time protection (Recommended)'.
This can be especially helpful on a laptop, as every little bit of tweaking helps improve battery life.
Just like another other protection tools, you can have automatic updates turn on so you won’t need to worry about updating the protection database.
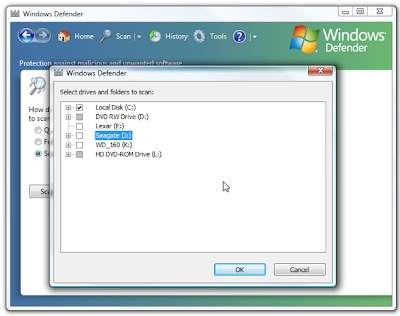
Windows Defender also provide us with several scan options.
Quick Scans - scans all essential OS directories
Full Scan - scans all files and folder
Custom Scan - it allows us to choose what to scan
Windows Defender is really a solid anti-malware application and has tons of features including scheduling scan times, viewing scan logs, and allowing user to control its behavior.
If you're a Windows XP user and has not install it yet, you can get it right here:
Download Windows Defender For XP and Server 2003
Found this article useful?
Mention us in your post, subscribe to our feed, link to us, or bookmark this site.
Thanks for your support!


AVG : Free Anti Virus
Computer Security: Free Anti-Virus Protection With AVG Free Edition
As technology advances, more and more people are actually very dependent on computers. No matter personal or work related, it often involves personal information or classified data.
Internet is another great help in our life, like a forest full of resources. But people should never forget, there are dangers lurking around the internet just like beast in the forest, we call them virus.
One of the more famous Anti Virus Software is non other than Norton. It not only provides a Virus Protection, but also Internet Security and Firewall. But the biggest draw back is it's yearly subscription fee.
But for people whom are unwilling to pay, there's also many well-known free anti-virus utilities which will do the job and are also well rounded in security.
Often friends will ask 'What's the best free Anti-Virus Software on the internet?'.
This answer really comes down to personal preference.
Let us start the ball rolling in the quest for Best Free Anti Virus Software.
This post, we will cover what is arguably the most effective and popular free anti-virus utility: Grisoft’s AVG Free Edition.
Like many other Anti-Virus Software, Installation is straight forward. But do make sure there is a free license included when installing.
During installation you will be prompted to choose to if you would like include the Toolbar.
This comes back to personal preference, I never like to install any toolbar as it makes my browser messy but AVG advises more web threats can be avoided when using it.
Internet Explorer and Firefox have already include good Phishing protection, so by having another toolbar might be just an addition.
Here's some detailed information from their site.
After a successful installation, a wizard begins to prompt for personal preference or setting for the utility.
But one most important step is to get the latest updates for the virus database.
Other settings includes scheduling daily scan and register your software with AVG.
You can go through the wizard or simply skip the process entirely as these settings can still be change later.
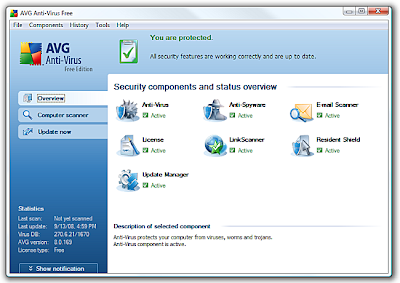
All settings and components can be access from the User Interface.
AVG Free Edition includes more than just anti-virus protection.
Other components include:
Anti-Spyware - Protects against malicious software applications
Email Scanner - Integrates with Outlook to scan email messages and attachments for Viruses and Spyware
Resident Shield - Real-time protection against viruses and malicious spyware
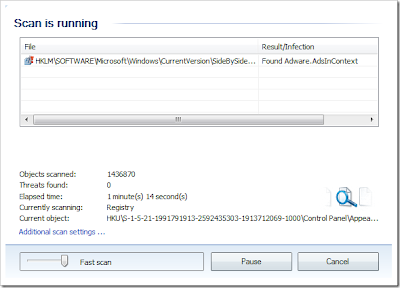
One unique point of AVG is it enables you to control the speed of Full system Scans.
The faster the scan the more CPU processing power required, so if you wish to continue using the computer while the scan is running choose a lower scan speed.
This is also where you can also pause, start, or resume a scan.
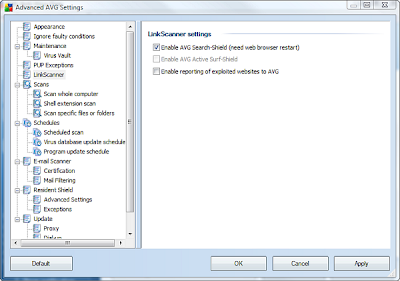
There are also a surprising amount of settings and options for you to customize how AVG works.
Like all other Anti-Virus Software, Pop up notifications are shown on the Taskbar.
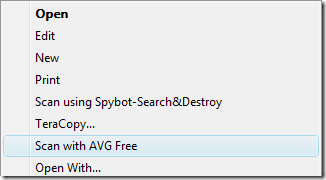
All email messages will be scanned and this will be verified by a message at the bottom of each email. Also, similar to other Anti-Virus Software, AVG integrates into Windows Explorer so you can scan individual files by right clicking.

Conclusion
AVG is so popular for a reason: the user interface is attractive and quite easy to use and there's also a bunch of options available to allow you to customize the behavior to your liking.
It also offers a lot of components and options that are only available in the professional version of other utilities, at the great price of free.
If you have used AVG for a while please comment and let us know your thoughts and opinions, or any recommended settings that you use.
Download AVG Free Edition For Windows
Found this article useful?
Mention us in your post, subscribe to our feed, link to us, or bookmark this site.
Thanks for your support!
Advertise With Us
Since Jul 2007, Computer Tips and Tricks begins to attract readers from all over the world with various people from different professions around the blogsphere.
Majority of our traffic are Unique Traffic from Google Search Engine whom wishes to look for latest Technology Product and News.
The following are some of our sponsor options that you might be interested to increase the awareness of your product, service or web sites.
Premium Link Sponsorship
1. Any Anchor Text of your choice linking to URL of your choice
2. Price: $5* per month.
Featured Post Sponsorship
We do write reviews for websites, products or services on a sponsorship basis. Each sponsorship will entitle you a featured post on your product, website or service which will stay on Homepage at least 2 weeks.
Each review costs $10*.
Feel free to contact me for payment details or other further inquires.
*50% of the advertising fee will go towards Singapore Children’s Society.
Found this article useful?
Mention us in your post, subscribe to our feed, link to us, or bookmark this site.
Thanks for your support!
Donation
Computer Tips and Tricks Supports Children’s Society

At Computer Tips and Tricks, you can contribute to the society just by advertising in this blog. 50% of the all monthly sales earning will be going to the Singapore Children’s Society.
As a regular contributor to Singapore Children’s Society, we also encourages you to share your existing wealth with the children by making a meaningful donation to the society especially if you find this blog useful and has helped you in some way or another.
You can use the eDonation page to make any contributions.
Singapore Children’s Society has been reaching out to more than 10,000 children and youth especially those who are abused, neglected, and/or from dysfunctional families. Their services can be categorized as follows:
- Care Giving - Taking care of children and youth on behalf of their parents/ guardians for a period of time.
- Preventive - Preventing children and youth from being harmed or becoming at risk of delinquency, abuse and/or neglect.
- Developmental - Educating and develop children and youth to become healthy and well rounded.
- Remedial - Providing rehabilitative services and medical subsidies to children and youth, with guidance and counseling for their families.
- Community - Promoting the welfare of children and youth through the fostering of happy family life.
- Public Education - Conducting research related to children, youth and family to raise public awareness.
Read more here.
Current Top Donors (through sponsoring Computer Tips and Tricks)
Found this article useful?
Mention us in your post, subscribe to our feed, link to us, or bookmark this site.
Thanks for your support!
Social Bookmarking Link In Post
As many might already know, one of the best way of building Backlink for your site/blog is adding it to Social Bookmarking Websites. Other than requesting your reader to help Bookmarking it if they find it useful, it's also equally important to provide them an easy way of Bookmarking.
Basically there's 3 types of Social Bookmarking Link which blogger often use.
1. AddThis
Addthis is a free service which provides a simple widget code which you can place into your template.
When users click it, they will be brought to a page of the most popular social bookmarking or feed reader services.
Through that interface, they can submit your site or blog post to their online bookmarks or feed readers. It work best for people whom like simplicity in design where there's only one button at the end of each post.
It also provides a well statistics of the popular posts that are bookmarked.
Register for a free account with them. When you are logged in, click on 'My Account' and 'Get the code for your widget'.
You can either have a bookmarking widget or feed widget, choose a size of the button, and indicate your blogging platform.
Once you click on the 'Get your free button link', you will be shown a few codes that you can use.
2. Social Bookingmarking Text Links
Text links are neat and can easily fit into the Post footer.
But unlike Addthis, it's a more complicated process adding Social Bookmarking Text Links to your post.
Let us take a look of an example of Digg:
<a href="http://www.blogger.com/%22http://digg.com/submit?phase=2&url=%22%20+%20data:post.url%20+%20%22&title=%22%20+%20data:post.title" target="_blank">Digg</a>
It's to an automatic link for every post, such that you do not have to key in the Post URL or Post Title.
I'm not too sure which of the Social Bookmarking Site you're interested, so lets list a few more popular one:
<!-- Start of social bookmarks. -->
<span style='font-size: 85%;' class='post-author'><br/>
Add Post To: |
<a expr:href='"http://digg.com/submit?phase=2&url=" + data:post.url + "&title=" + data:post.title' target='_blank'>Digg</a>|
<a expr:href='"http://technorati.com/faves?add=" + data:post.url' target='_blank'>Technorati</a>|
<a expr:href='"http://del.icio.us/post?url=" + data:post.url + "&title=" + data:post.title' target='_blank'>del.icio.us</a>|
<a expr:href='"http://www.stumbleupon.com/submit?url=" + data:post.url + "&title=" + data:post.title' target='_blank'>Stumbleupon</a>|
<a expr:href='"http://reddit.com/submit?url=" + data:post.url + "&title=" + data:post.title' target='_blank'>Reddit</a>|
<a expr:href='"http://www.blinklist.com/index.php?Action=Blink/addblink.php&Url=" + data:post.url + "&Title=" + data:post.title' target='_blank'>BlinkList</a>|
<a expr:href='"http://www.furl.net/storeIt.jsp?t=" + data:post.title + "&u=" + data:post.url' target='_blank'>Furl</a>|
<a expr:href='"http://www.spurl.net/spurl.php?url=" + data:post.url + "&title=" + data:post.title' target='_blank'>Spurl</a>|
<a expr:href='"http://myweb2.search.yahoo.com/myresults/bookmarklet?t=" + data:post.title + "&u=" + data:post.url' target='_blank'>Yahoo</a>|
<a expr:href='"http://www.simpy.com/simpy/LinkAdd.do?href=" + data:post.url + "&title=" + data:post.title' target='_blank'>Simpy</a>|
<br/></span>
<!-- End of social bookmarks -->
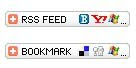
3. Social Bookmarking Icon
If you prefer images instead of text, you can have icons or buttons to represent the bookmarking sites.
The icon links will look like what we're having here in Computwer Tips and Tricks.
You can easily find these popular Social Bookmarking Icons by Google and uploading them to free picture hosting. Replace the Text in the above code with the icons, and you're ready to roll.
But for the benefit for my readers, here's what I use (With credits to TipsForNewBlogger):
<!-- Start of social bookmarks. --><br/>
<a expr:href='"http://digg.com/submit?phase=2&url=" + data:post.url + "&title=" + data:post.title' target='_blank'><img alt='Digg' src='http://i191.photobucket.com/albums/z76/tipsfornewbloggers/digg.gif'/></a>
<a expr:href='"http://technorati.com/faves?add=" + data:post.url' target='_blank'><img alt='Technorati' src='http://i191.photobucket.com/albums/z76/tipsfornewbloggers/technorati.gif'/></a>
<a expr:href='"http://del.icio.us/post?url=" + data:post.url + "&title=" + data:post.title' target='_blank'><img alt='del.icio.us' src='http://i191.photobucket.com/albums/z76/tipsfornewbloggers/delicious.gif'/></a>
<a expr:href='"http://www.stumbleupon.com/submit?url=" + data:post.url + "&title=" + data:post.title' target='_blank'><img alt='Stumbleupon' src='http://i191.photobucket.com/albums/z76/tipsfornewbloggers/stumbleupon.gif'/></a>
<a expr:href='"http://reddit.com/submit?url=" + data:post.url + "&title=" + data:post.title' target='_blank'><img alt='Reddit' src='http://i191.photobucket.com/albums/z76/tipsfornewbloggers/reddit.gif'/></a>
<a expr:href='"http://www.blinklist.com/index.php?Action=Blink/addblink.php&Url=" + data:post.url + "&Title=" + data:post.title' target='_blank'><img alt='Blinklist' src='http://i191.photobucket.com/albums/z76/tipsfornewbloggers/blink.gif'/></a>
<a expr:href='"http://www.furl.net/storeIt.jsp?t=" + data:post.title + "&u=" + data:post.url' target='_blank'><img alt='Furl' src='http://i191.photobucket.com/albums/z76/tipsfornewbloggers/furl.gif'/></a>
<a expr:href='"http://www.spurl.net/spurl.php?url=" + data:post.url + "&title=" + data:post.title' target='_blank'><img alt='Spurl' src='http://i191.photobucket.com/albums/z76/tipsfornewbloggers/spurl.gif'/></a>
<a expr:href='"http://myweb2.search.yahoo.com/myresults/bookmarklet?t=" + data:post.title + "&u=" + data:post.url' target='_blank'><img alt='Yahoo' src='http://i191.photobucket.com/albums/z76/tipsfornewbloggers/yahoo.gif'/></a>
<a expr:href='"http://www.simpy.com/simpy/LinkAdd.do?href=" + data:post.url + "&title=" + data:post.title' target='_blank'><img alt='Simpy' src='http://i191.photobucket.com/albums/z76/tipsfornewbloggers/simpy.gif'/></a><br/>
<!-- End of social bookmarks -->
Where to place the Bookmarking Code?
Here's the important question, other than placing these Social Bookmarking Links in sidebar, where else can we place it?
Simply follow these steps:
Go to 'Template' > 'Edit HTML' and check the box that says 'Expand Widget Templates'.
Here's the few location to place these code to it to work best (illustrated using default Blogger Template):
1. You can place them just below your Posts and before the 'Posted By' line. Scroll to these lines and place the relevant code at the red portion:
<div class='post-body'>
<p><data:post.body/></p>
<div style='clear: both;'/> <!-- clear for photos floats -->
</div>
PLACE CODE HERE
<div class='post-footer'>
<p class='post-footer-line post-footer-line-1'>
2. If you want it to be just above the labels:
Scroll to these lines and insert the relevant code at the red portion:
PLACE CODE HERE
<p class='post-footer-line post-footer-line-2'>
<span class='post-labels'>
<b:if cond='data:post.labels'>
3. Should you want the bookmark links to be at the bottom after the labels:
Scroll to these lines and place the code at the red portion:
<p class='post-footer-line post-footer-line-2'>
<span class='post-labels'>
<b:if cond='data:post.labels'>
<data:postLabelsLabel/>
<b:loop values='data:post.labels' var='label'>
<a expr:href='data:label.url' rel='tag'>
<data:label.name/>
</a><b:if cond='data:label.isLast != "true"'>,</b:if>
</b:loop>
</b:if>
</span>
</p>
PLACE CODE HERE
Found this article useful?
Mention us in your post, subscribe to our feed, link to us, or bookmark this site.
Thanks for your support!
Un-Freeze Vista Without Rebooting
Has Windows Vista ever freeze on your when you're trying to open certain program or trying to use certain Windows Component such as the Search Files Function?
Normally, the system freeze-up will occurred when you’re working on several file or document at the same time.
Rebooting the system is not a good option to solve this problem because you will lose any unsaved data in any open programs or document.
Here's a simple trick to fix this problem without rebooting and losing your work:
1. When a Windows component freezes and becomes unresponsive, press Ctrl + Alt + Del.
2. Click the Start Task Manager button
3. Click the Processes tab.
4. In the Image Name column, find the explorer.exe process.
5. Right-click on explorer.exe and select End Process
6. A Task Manager warning pop-up is displayed, Click Yes to end the process
This step should make the desktop, and possibly open applications, temporarily disappear.
7. In Task Manager, click on the File menu, and select New Task (Run…)
8. Type explorer.exe on the New Task windows, and click OK.
The Windows Explorer Shell should restarts and applications you had open previously, reappear.
That’s it, now you can continue working without worrying to lose data :)
Found this article useful?
Mention us in your post, subscribe to our feed, link to us, or bookmark this site.
Thanks for your support!
Fixing Stuck Pixel On LCD Monitor
What is a stuck pixel?
A stuck pixel will usually be most visible against a black background, where it will appear red, green, blue, cyan, magenta, or yellow, although stuck red, green, or blue pixels are most common.
Each pixel on an LCD monitor is composed of three sub pixels (one red, one green, and one blue) which produce the visible color of the pixel by their relative brightness.
A stuck pixel results from a manufacturing defect, which leaves one or more of these sub-pixels permanently turned on or off.
Unlike dead pixel, which is a defective pixel that remains unlit, a stuck pixel can actually be fix.
Some may ask, isn't Computer Tips and Tricks all about Software? Why LCD Monitor?
Recently I've come across this Stuck Pixel problem on my Laptop. After much research and trying, I've only managed to fix 1 out of 2 Stuck Pixel.
So I've decided to share these method which I've used and hope you guys out there could share with me yours as to fix my Last Stuck Pixel!
If your LCD screen has a stuck or dead pixel (a point on the screen that is always lit or always dark), it is usually due to a transistor malfunction or uneven distribution of liquid in the liquid crystal display (TFT LCD).
From what I've read, there's mainly 3 method of fixing: Software, Pressure and Tapping.
Software Method
Just like what it's named, try running pixel fixing software. Stuck pixels can often be re-energized by rapidly turning them on and off.
JScreenFix is what I've used and effectively fixed 1 of my Stuck Pixel.
Pressure Method
Try it only if Software Method doesn't work for you.
1. Turn off your computer's monitor.
2. Get yourself a damp washcloth, so that you don't scratch your screen.
3. Take a household pen, pencil, screwdriver, or some other sort of instrument with a focused, but relatively dull, point. A very good tool would be a PDA stylus.
4. Fold the washcloth to make sure you don't accidentally puncture it and scratch the screen.
5. Apply pressure through the folded washcloth with the instrument to exactly where the stuck pixel is. Try not to put pressure anywhere else, as this may make more stuck pixels.
6. While applying pressure, turn on your computer and screen.
7. Remove pressure and the stuck pixel should be gone.
This method is especially useful when the liquid in the liquid crystal has not spread into each little pixel. This liquid is used with the back light on your monitor, allowing different amounts of light through, which creates the different colors.
Tapping Method
Try it only if Software Method doesn't work for you.
1. Turn on the computer and LCD screen.
2. Display a black image, which will show the stuck pixel very clearly against the background.
It is very important that you are showing a black image and not just a blank signal, as you need the back lighting of the LCD to be illuminating the back of the panel.
3. Find a pen with a rounded end. A Sharpie marker with the cap on should be fine for this.
4. Use the rounded end of the pen to gently tap where the stuck pixel. Not too hard to start with, just enough to see a quick white glow under the point of contact. If you didn't see a white glow, then you didn't tap hard enough, so use apply slightly more pressure.
5. Start tapping gently. Increase the pressure on the taps gradually for 5-10 taps until the pixel rights itself.
6. Display a white image (an empty text document is good for this) to verify that you haven't accidentally caused more damage than you fixed.
Additional Tips and Information from WikiHow
- If the pressure and tapping don't work directly on the stuck pixel, start moving outward around the stuck pixel. If you see the pixel flicker while doing this then you know where you can focus the pressure and tapping techniques rather than directly on the pixel.
- Many people report success with this technique but these instructions won't work in every case. It may take a few attempts to make sure you are pressing exactly on the stuck pixel.
- These instructions will fix Stuck Pixels, not Dead ones. Dead Pixels appear black while Stuck Pixels can be one constant color like red, blue or green.
- Alternative technique to Pressure Method: Gently massage the Stuck Pixel with a warm damp (not wet) soft cloth.
- Alternative technique to Tapping Method: Using a rounded pencil eraser, push with moderate pressure into screen at stuck pixel.
Warnings
- Do not attempt to open the monitor as it will void the warranty and the manufacturer will not replace it.
- Make sure you don't get any electrical equipment wet or it may break.
- Some people claim that touching the screen can cause more pixels to become stuck, although this has not been proven.
- Try all methods at own risk, Computer Tips and Tricks shall not be held responsible for any damage or loss.
Found this article useful?
Mention us in your post, subscribe to our feed, link to us, or bookmark this site.
Thanks for your support!
